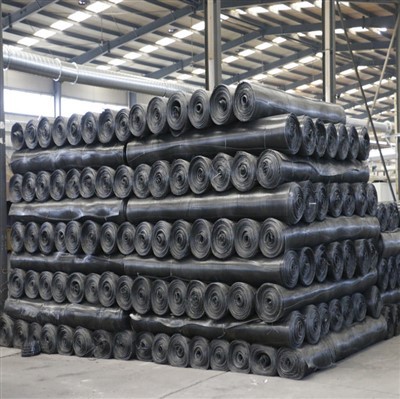

If you’ve ever worked on a canal lining project, you know how critical it is to get the geomembrane installation right—mess up even a small part, and you’re looking at leaks, water loss, or structural damage down the line. As a PVC geomembrane supplier, I’ve walked through dozens of canal installs, and let me tell you, it’s not just unrolling a sheet and calling it a day. There’s a method to the madness that keeps the membrane durable, watertight, and long-lasting. Here’s the step-by-step breakdown we always follow, plus a few insider tips that make all the difference.
First, let’s set the stage: canals are different from ponds, tunnels, or landfills—they’re linear, exposed to constant water flow, UV rays, and sometimes fluctuating water levels, so the membrane needs to be flexible enough to move with the canal but tough enough to hold up. That’s why we often recommend our Smooth Flexible PVC Geomembrane Liner for canal work—its smooth surface cuts down on friction from water flow, and the flexibility lets it conform to the canal’s shape without tearing. You can check that product out here: Smooth Flexible PVC Geomembrane Liner.
Step 1: Prep the Canal Substrate Like Your Project Depends On It (Because It Does)
Skip the bad prep, and your membrane will fail faster than a DIY DIY DIY project. I can’t stress this enough—this is the foundation of a good install. Start by clearing the entire canal area: pull out all rocks, roots, weeds, and even small debris. Any sharp object left behind will poke holes in the PVC membrane over time, so we use a 10mm mesh geotextile underlayment to add a buffer. Wait, you might ask—why not just smooth the soil? Soil still has tiny, uneven particles that can cause abrasion, especially as water flows. The geotextile adds a soft, protective layer without adding too much bulk, and it also prevents soil from mixing with the membrane.
Next, grade the canal’s slopes and base to make sure there are no depressions or sharp angles. For slopes steeper than 1:2 (that’s 1 foot of vertical for every 2 feet of horizontal), we add a slight taper and use temporary stakes to hold the geotextile in place while we lay the membrane. If the canal has any existing cracks or hard spots, we patch them with a cementitious material or compacted soil so they’re flush with the rest of the substrate. One pro tip: do a final sweep with a magnetic metal detector to pick up any leftover nails or rebar fragments—you’d be surprised how often those get missed, and they’re the #1 cause of pinhole leaks in PVC.
Step 2: Measure and Cut the Membrane Accurately (No Wasting Materials = Happy Clients)
Wasting PVC geomembrane isn’t just bad for your budget—it’s a sign you didn’t measure right. For canals, you need to account for both the base and the slopes, plus extra material for overlaps and “sag” between sections. A good rule of thumb: add 15% to your total surface area measurement to cover overlaps, anchor trenches at the top of the slopes, and any minor adjustments needed on-site.
Wait, why overlaps? Because you need to seal the edges between membrane sheets to prevent leaks. We use a hot-air welding machine for PVC geomembranes—chemical adhesives work, but hot-air welding creates a seamless bond that’s stronger than the membrane itself. When cutting, don’t just eyeball it: use a chalk line to mark straight edges for sheets, and cut pieces to follow the canal’s curves instead of forcing the membrane into a shape it doesn’t fit. For narrow canals, we often use full-length sheets to reduce the number of seams—fewer seams = fewer potential leak points. If you’re working on a larger canal, you’ll need multiple sheets, and we make sure each sheet is cut with consistent 15cm to 20cm overlaps (wider for slopes, since water flow can put more stress on seams). By the way, we’ve got other PVC geomembrane products for different water projects—like PVC Pond Liner Geomembrane for smaller lined water features, if your canal project is part of a bigger pond system. Check that out here: PVC Pond Liner Geomembrane.
Step 3: Lay the Membrane Without Stretching It Too Tight (Or Too Loose)
Stretching PVC membrane like a trampoline is a rookie mistake. You need just enough slack to let the membrane move as water levels change—if it’s too tight, it’ll tear when the canal is full or empty; if it’s too loose, it’ll bunch up in the middle, trap debris, and create weak spots. Here’s how we lay it: start at the lowest point of the canal (the base) and work your way up the slopes. Unroll the membrane slowly, making sure it lies flat against the geotextile. Use wooden stakes (not metal—metal can scratch the membrane) to hold the edges temporarily, but don’t drive them all the way in yet.
For long stretches of membrane, we have a couple crew members walk on either side to smooth out wrinkles as they go—wrinkles might seem harmless, but they can trap sediment and create places where the membrane wears unevenly, especially with constant water flow. If you’re working in a sunny area, try to lay the membrane early in the morning or on a cloudy day—PVC can get stiff when it’s hot, making it hard to work with. If you have to lay it in direct sun, roll out just a section at a time and cover it with a tarp until you’re ready to weld seams. That’s also why our flexible PVC geomembrane is perfect for outdoor canal projects—its flexibility stays consistent in moderate to warm temperatures, so it’s easier to handle than stiffer alternatives. We also have a Flexible PVC Geomembrane For Artificial Lake Project, which works great for canals that are connected to man-made water bodies—same durable, flexible build, just tailored for similar water retention projects. Check that out here: Flexible PVC Geomembrane For Artificial Lake Project.
Step 4: Weld Seams Correctly (Seams Are the Weak Link—Don’t Mess This Up)
If you’ve done the prep and laying right, bad seams are the only thing that can ruin a canal liner. Hot-air welding is the way to go here, not glue. Here’s the process: first, clean the overlap edges with a degreaser to remove any dirt or dust—even a tiny bit of mud can make the weld fail. Then, set your hot-air welder to the manufacturer’s recommended temperature (usually around 350°C for PVC, but always double-check because different batches can vary). Run the welder along the overlap, making sure the two layers of PVC melt together evenly. After welding, do a pressure test: use a small inflatable tester to check that the seam holds air—if air leaks out, go back and re-weld that spot.
For vertical seams on steep slopes, we add a slight “ridge” in the weld to let water run off, so it doesn’t pool on top of the seam and cause damage. Also, make sure the top of the membrane (the end of the slope) is properly anchored—we dig a 30cm deep trench at the top of each slope, fold the membrane over into the trench, and cover it with compacted soil or concrete to hold it in place. No one wants their membrane to shift after a heavy rainstorm. We’ve worked on bigger projects too, like landfills, where PVC geomembranes need to withstand even more extreme conditions—you can see those here: PVC Geomembranes For Landfill. The same welding and installation principles apply, just with extra durability for heavier loads.
Step 5: Final Inspection and Filling the Canal (Don’t Rush This Part)
Before you turn on the water, do a full walkthrough of the entire canal. Check for wrinkles, loose seams, or any spots where the membrane might have shifted. Run your hand over every inch—even a small bubble can turn into a big leak over time. We also do a “dry run” with water (a small amount, not full) to let the membrane settle into place—sometimes, after the first water touches it, you’ll see tiny wrinkles pop up that you missed earlier. Fix those before full filling.
Once everything checks out, fill the canal slowly. Don’t blast water straight at the membrane from a hose—direct force can shift the membrane or even damage it. Instead, use a diffuser at the end of the hose, or direct water towards the side of the canal, so it flows in gently. Watch the membrane for the first few days as water fills up—look for any bulges or leaks. If you do find a tiny leak, patch it right away: clean the area, cut a small patch of PVC membrane, use the hot-air welder to seal it over the leak. Even pinhole leaks can get worse over time, so addressing them early is key.
Now, a quick note on maintenance: to keep your canal membrane working for years, do annual checks for UV damage (even if it’s covered by water sometimes, parts of the top slope might be exposed), and make sure debris doesn’t build up along the edges. As a supplier, we also offer installation guides and troubleshooting tips if you run into issues, so you don’t have to figure it out on your own.


If you’re planning a canal lining project and need reliable PVC geomembranes, or have questions about sizing, seams, or prep work, we’re here to help with your sourcing and installation needs. Reach out to our team to discuss your project requirements.
References
- Geosynthetic Materials Association. (2020). PVC Geomembrane Installation Guidelines for Water Retention Projects.
- American Society of Civil Engineers. (2018). Canal Lining Systems: Best Practices for Material Selection and Installation.
- International Technical Guidance on Geosynthetics. (2021). PVC Membrane Sealing Techniques for Linear Water Structures.
- ASTM International. (2019). Standard Guide for Installation of Polyvinyl Chloride (PVC) Geomembranes.