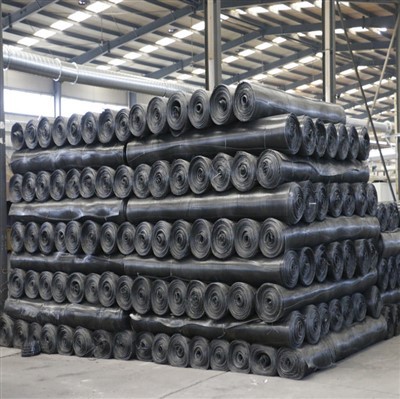

If you’ve ever worked on a small-scale project—say a backyard aquaculture pond, a small residential water retention basin, or a low-capacity secondary containment area for a home workshop’s chemical storage—you know that even the smallest details can make or break success. One such detail that often gets overlooked until it’s time to build is choosing the right liner, and for many small projects, High Density Polyethylene (HDPE) geomembrane is the go-to option. As someone who’s worked with HDPE geomembrane for years (and runs a supplier that has helped hundreds of small teams navigate their liner needs), I’ve seen firsthand that installation method is just as critical as the liner itself.
HDPE is unique among geomembranes because it’s flexible enough to conform to uneven, small-scale surfaces but durable enough to resist punctures, UV damage, and chemical exposure for decades. But when you’re working on a project that’s not a massive industrial landfill or a commercial aquaculture farm, the installation rules aren’t always the same as for large sites. That’s why I want to walk you through the most practical, science-backed installation methods for HDPE geomembrane in small-scale projects—no fancy heavy machinery required, no overcomplicated steps, just what works when you’re working on a manageable, local project.
First, before we dive into installation, let’s clarify what HDPE geomembrane is and why it’s worth considering over other options. If you’re new to liners, check out the High-Density Polyethylene (HDPE) Geomembrane page on our site for a breakdown of material properties, or compare it to other common liner types like EPDM Geomembrane if your project needs more flexibility. For small-scale aquaculture especially, Geomembrane For Aquaculture Pond Lining System is designed with exactly these projects in mind—thinner gauge, easier to handle, and resistant to the nitrates and bacteria in pond water. And if you’re ready to start browsing products, our Hdpe Geomembrane Liner page has the full range of sizes and gauges tailored for small projects.
Now, let’s talk about the installation methods. For small-scale projects (anything less than, say, 1 acre), the best approaches fall into three categories: single-sheet installation, patch-and-seam installation for curved or tight areas, and prefabricated panel installation. Each works better for different project types, and knowing when to use which will save you time, money, and headaches later.
1. Single-Sheet Installation: Best for Simple, Flat Surfaces
Single-sheet installation is exactly what it sounds like: laying one continuous piece of HDPE geomembrane over your entire project area without cutting it into smaller panels. This is the go-to method for small, simple jobs like a backyard water tank base, a small garden pond, or a residential secondary containment pad. The beauty of this method is that you eliminate the need for seams—seams are the most common point of failure in geomembrane liners, so fewer seams mean fewer leaks.
Let’s break down how to do this right. First, you need to prepare the base of your project. For a small pond, that means removing all rocks, roots, sticks, and sharp debris; then covering the soil with a geotextile underlayment (a thin, porous fabric that acts as a buffer between the soil and the HDPE). I’ve seen too many small projects skip this step, and within a year, a small rock had punctured the liner, leading to leaks that were hard to find and fix. For small-scale work, a 6-ounce per square yard geotextile is more than enough—it’s easy to lay, doesn’t add much bulk, and is cheap enough to not blow a small project budget.
Next, measure your area correctly. This is where I see most small project owners make a mistake: they measure the surface area of their project (length times width, for example) and buy a piece of HDPE that matches that size. But you need extra material for “draping” around edges. For ponds, that means at least 12 inches of extra liner around the entire perimeter to tuck over the bank and secure it. For a containment pad, that means 6 to 12 inches of extra liner to fold up over the side walls and weight down. To get the right size, add the extra perimeter inches to both length and width, then buy the nearest standard HDPE liner size—we at our supplier can cut custom sizes, but for small projects, standard rolls (10ft x 20ft, 15ft x 30ft) are usually available off the shelf.
Once you have your liner, lay it out over the underlayment. Don’t stretch it tight—HDPE expands and contracts with temperature, so leaving a little slack (about 5% extra) will prevent the liner from pulling at the edges when it heats up in the sun. For small, flat surfaces, you can just smooth it out with your hands or a push broom to get rid of air bubbles. Finally, secure the edges: for ponds, dig a small trench along the perimeter, tuck the extra liner into the trench, cover it with soil, and pack it down. For containment pads, place heavy objects (like concrete blocks or large rocks) along the edges to hold the liner in place until you’re ready to put whatever you’re containing on top.
This method works best for projects under 1,000 square feet. If your project is larger than that, single-sheet might not be practical—standard rolls only go so big, and transporting a 50-foot liner to a backyard pond is almost impossible.
2. Patch-and-Seam Installation: Best for Curved, Tight, or Irregular Areas
Many small-scale projects aren’t perfectly flat or rectangular. A garden pond with a curved edge, a pond with a small island in the middle, or a containment area with odd-shaped posts or pillars—these require a little more work, and that’s where patch-and-seam installation comes in. This method involves cutting the HDPE geomembrane into smaller panels that fit the irregular shapes, then welding them together along the seams.


The key here is to use the right welding method. For small projects, the two most common welding techniques are hot air welding and extrusion welding, and both work well for HDPE. Hot air welding is perfect for thin-gauge HDPE (20 to 40 mils), which is the standard for small ponds and small containment areas. It uses a handheld tool that blows hot air onto the edges of two HDPE panels, melting them so they fuse together. For small jobs, you can rent a hot air welder for a day, and it’s easy to learn—you just need to make sure the edges are clean, no dirt or debris, and you move the tool at a consistent speed to create a strong, leak-proof seam.
Extrusion welding is for thicker HDPE (40 mils and up), which might be used if your project is holding heavy materials, like a small fuel storage pad. It works by melting a small rod of HDPE (made from the same material as your liner) and pressing it into the gap between two panels, creating a seam that’s actually stronger than the liner itself. Extrusion welders are a little more expensive to rent, but for small-scale projects that need extra durability, it’s worth it.
When doing patch-and-seam, the most important rule is to lay out your panels first, dry, before welding anything. For a curved pond edge, for example, you might cut the main liner panel to fit the bottom of the pond, then cut a smaller patch to fit the curved side, leaving a 1/2-inch overlap along the edges that will be welded. Dry layout lets you adjust the shapes so they fit perfectly, without having to cut and patch too much. Another tip: always weld on a day that’s not too hot or too cold—temperatures between 50°F and 80°F are ideal for hot air welding, because extreme cold makes the weld brittle and extreme heat can make the HDPE sag.
3. Prefabricated Panel Installation: Best for Repeat Small Projects
If you’re a contractor or a hobbyist who does small projects regularly—like building multiple backyard aquaculture ponds for neighbors, or small containment pads for local businesses—prefabricated panel installation might save you a lot of time. This method involves having HDPE panels cut to exact custom sizes (and even pre-welded together at the factory) to fit your project. You then just transport the panels to the site and weld them on-site, reducing the amount of cutting and welding you have to do on location.
The biggest advantage here is consistency. Factory-made panels are cut with precision, so you don’t have to worry about uneven edges or misaligned cuts, and factory welds are done with professional equipment that meets industry standards. For small projects, you can order panels as small as 2ft x 2ft or as large as 20ft x 30ft, and many suppliers (including our team) will pre-weld them into larger sections if you need. For example, if you’re building a 10ft x 15ft pond, we can send you two pre-welded panels of 10ft x 7.5ft, so you only have one seam to weld on-site instead of multiple. That cuts down on labor time and reduces the chance of human error during welding.
Prefabricated panels also work well for projects with fixed structures. If you have a small shed or a concrete pad that you need to line around, prefabricated panels can be cut to fit exactly around the structure, eliminating the need to patch awkward gaps. The downside is that you have to plan ahead—you can’t just pick up prefabricated panels at a local hardware store, so you need to order them a week or two in advance. But for repeat projects or projects with tight deadlines, it’s worth the wait.
Critical Small-Scale Installation Tips I’ve Learned From Years of Doing This
Over the years, I’ve helped hundreds of small project teams install HDPE geomembrane, and I’ve learned that the small details are what separate a job that lasts 10 years from one that leaks in 1 year. Here are the tips I always share:
First, always test your seams. No matter which installation method you use, every seam needs a leak test. For small seams, the simplest way is the “water test”: fill a small bucket with water and pour it along the seam, watching for any water that seeps through. Or, for a quick check, you can use a seam tester (a small handheld tool that applies pressure to the seam and checks for gaps) which is easy to rent. I once worked on a small pond where the installer skipped the test, and a month later, we found a seam that had a tiny pinhole leak—thanks to the water test, we would have caught it before filling the entire pond.
Second, don’t skip the base preparation. I can’t stress this enough. Even a tiny sharp rock or a piece of grass can puncture HDPE, especially in small projects where you might not have the budget for extra-thick liner. The geotextile underlayment isn’t just a “nice to have”—it’s a barrier that protects the liner from the soil below. For a small project, take 1-2 hours to clear the area, smooth it out, and lay the underlayment—this will save you thousands in repairs later.
Third, consider the environment. If your project is in a sunny area, make sure you use an UV-stabilized HDPE liner—all liners we sell at our site come with UV stabilizers, but it’s good to confirm when ordering. If your project is in a cold climate, avoid installing HDPE when temperatures are below 40°F, because the liner becomes brittle and can crack when you’re handling it. For projects that hold chemicals (even small amounts), check the liner’s chemical resistance chart—HDPE works for most common chemicals, but some strong acids or solvents might require a different liner, which you can compare using the EPDM or HDPE product pages on our site.
Finally, for the love of all things linear, don’t overstretch the liner. As I mentioned earlier, HDPE expands when it’s warm and contracts when it’s cold. If you stretch it tight during installation on a 70°F day, when the temperature drops to 30°F at night, the liner will shrink and pull at the edges or even tear. Leave that 5% slack— it’s not extra material, it’s insurance.
Wrapping Up: Pick the Method That Fits Your Project
At the end of the day, the best installation method for your small-scale project depends on your project’s shape, size, and your own experience. If you’re building a simple, small garden pond, single-sheet installation is fast and foolproof. If your project has curved edges or odd shapes, patch-and-seam will give you a perfect fit. If you’re doing multiple projects, prefabricated panels will save you time and reduce mistakes.
HDPE geomembrane is one of the most reliable liners for small projects, but only if it’s installed correctly. I’ve seen a $500 liner fail because of a $10 geotextile underlayment, and I’ve seen a $10,000 pond last 20 years because of careful installation. That’s why I always tell small project owners to take their time, follow the steps, and don’t cut corners on preparation or testing.
If you’re ready to get started, our site has all the resources you need—from product specifications to installation guides, and custom HDPE liners sized for any small project. Whether you’re lining an aquaculture pond, a containment pad, or a garden feature, we can help you pick the right liner and answer any questions you have about installation. Reach out to our team to discuss your project and place your order.
References
- International Finance Corporation. (2012). HDPE Geomembrane Design and Installation for Small-Scale Containment Applications. World Bank Group.
- American Society for Testing and Materials (ASTM). (2018). Standard Practice for Installation of HDPE Geomembranes for Small Projects. ASTM D7176-18.
- Aquaculture Engineering Society. (2020). Liner Selection and Installation for Small-Scale Aquaculture Ponds. Journal of Small-Scale Aquaculture, Vol. 12, No. 3.